
Winterizing Your RV: All-in-One Checklist


Winter is just around the corner, and that means freezing weather is on its way (if it hasn’t already made it to your neck of the woods). In the past, this has meant my family of full-time RVers needed to head south. However, since we are stationary in Oklahoma this winter, it means we need to winterize the RV.
Fortunately I have done this a few times before, so I know the routine. However, those who don’t know how to winterize an RV might be feeling overwhelmed. That’s where this article comes into play.
Read on and you’ll learn everything you need to know on the subject!
Why Winterizing Your RV Matters
You probably already know that water expands when it freezes. In an RV that is left sitting empty and cold over the winter, this fact can cause major problems. Even a small amount of residual water in pipes, fittings, or valves can freeze—and the damage caused is never fun, something we learned the hard way a few years back when a freak ice storm came our way and a water line burst in our motorhome.
Besides water issues, storing an RV without prepping it first can lead to problems with pests, mold, battery damage, and tire damage. Obviously, none of these things are fun either, making proper winterization even more necessary.
Step-by-Step RV Winterization Checklist
So how do you go about winterizing an RV? I’ve outlined all the steps below to make it as straightforward as possible. Follow these steps and you’ll be good to go.
Gather Your Supplies
First things first: gather your supplies. There are several things you’ll want to have on hand. These include:
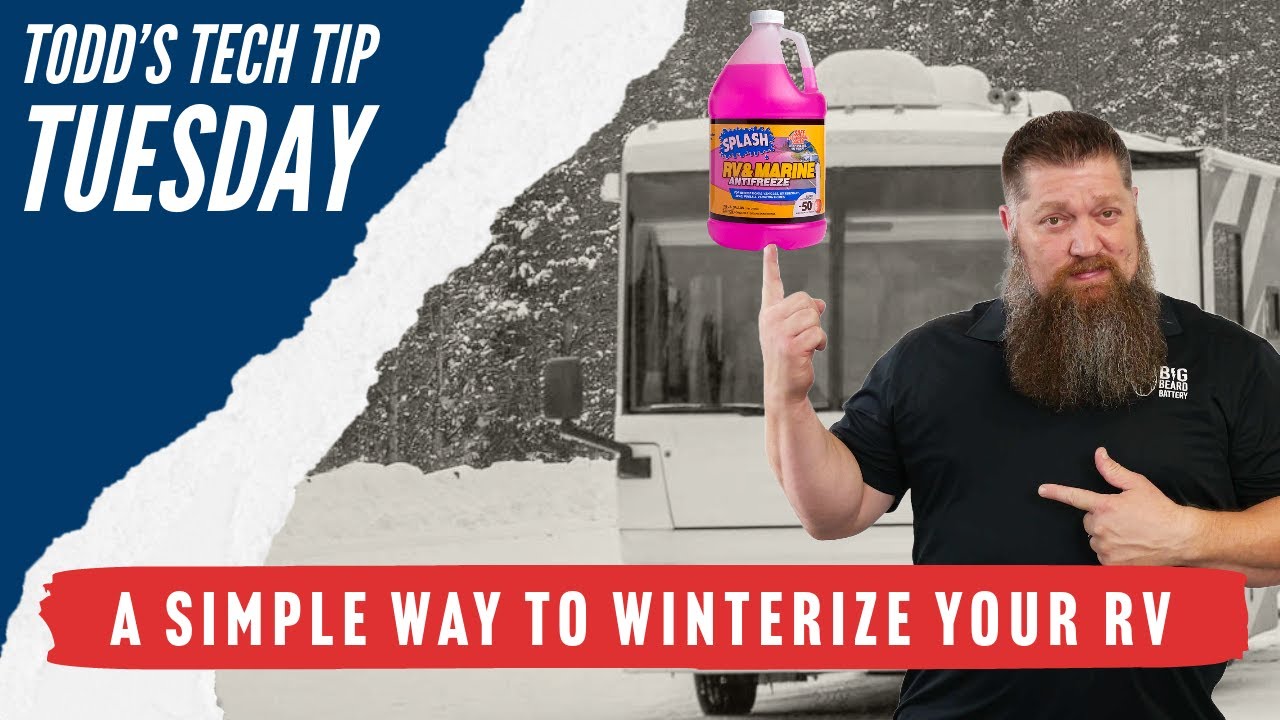
- RV antifreeze (non-toxic, propylene glycol-based) — We’ve always needed between 2 and 3 gallons.
- Water heater bypass kit. We’ve owned four RVs and all have had one installed at the factory, but if your rig doesn’t have one, you’ll need to get one and install it.
- Water pump converter kit or clear tubing to feed antifreeze into the water system. Again, this has always been installed in our RVs when we’ve gotten them.
- Basic hand tools. Things like wrenches, screwdrivers, and pliers are usually necessary.
- RV-safe cleaner and disinfectant for cleaning the RV.
- Air compressor with blowout plug (optional—for air method winterization).
- Wheel chocks for ensuring the RV doesn’t roll.
- Jack stands (if storing for long periods).
- Moisture absorbers or dehumidifiers for keeping moisture out of the RV, as well as preventing mold and mildew.
- Rodent deterrents (dryer sheets, traps, or natural repellents).

Drain and Flush the Water System
For obvious reasons, the first critical step is to remove all water from your RV’s plumbing:
- Turn off your water heater and allow it to cool completely. (This is super important!)
- Disconnect the water source.
- Open all faucets inside and outside your RV—including showers and outdoor kitchens—and let them drain completely.
- Drain the fresh water tank by opening the drain valve.
- Open low-point drains to allow any leftover water to drain.
- Drain the gray and black holding tanks at a dump station. Rinse them thoroughly using a tank flush system or wand.
- Remove and drain the water filter if you have one. We like to store the filter separately for the winter.
- Once cooled completely, drain the water heater tank by pulling the plug or anode rod. Inspect the anode rod for corrosion and replace it if it’s more than 75% deteriorated.
Make sure you let the system drain completely before moving on. Remember that even a tiny bit of water can freeze and cause something to break or burst.
Bypass the Water Heater
An empty water heater tank won’t freeze. Therefore, it’s super wasteful to fill your entire 6–10 gallon water heater tank with antifreeze. Fortunately, you can bypass the water heater, making it possible to fill the rest of the system with antifreeze while skipping the heater tank.
To do this, turn the water heater bypass valves to shut. These are usually located near the back of the water heater. As mentioned before, if your RV doesn’t have a bypass, you can install a simple kit from an RV parts store.
Pump RV Antifreeze Through the System
Even after opening every faucet and low-point drain, a bit of residual water may remain. This is where the RV antifreeze can help.
To add antifreeze to your system…
- Close the freshwater tank drain, all faucets, and the low-point drains.
- Switch the water pump to pull from the converter hose rather than the fresh tank.
- Insert the converter hose into the antifreeze bottle.
- Turn on the water pump to draw antifreeze into your system.
- Open each faucet (hot and cold) one at a time until pink fluid appears.
- Flush the toilet until pink fluid runs into the bowl.
- Don’t forget the shower, exterior faucets, and low-point drains.
One bottle will probably not be enough. Make sure to replace the bottle as needed. Running a water pump dry can cause damage.
Protect the Batteries
Cold weather can drain your RV’s batteries quickly, and draining the batteries entirely will shorten their lifespan. On top of that, freezing temperatures can also shorten their lifespan.
In order to avoid this issue, disconnect the batteries and remove them from the RV. Next, clean the terminals and lightly coat them with dielectric grease or petroleum jelly to prevent corrosion. Store batteries in a cool, dry place and keep them on a maintenance charger or battery tender.
Tip: If your RV has multiple batteries (house and chassis), label them to avoid confusion in spring.
Clean and Protect the Interior
Water is a big issue and is the thing that scares me most when putting my RV into storage. That said, odors and pests are also big threats. For this reason, I always make sure to do all of the following before storing my rig:
- Remove all food, toiletries, and perishables. Even sealed items can attract rodents.
- Clean thoroughly. Vacuum, wipe down surfaces, and clean the refrigerator and freezer.
- Prop open the fridge and freezer doors to prevent mildew.
- Use moisture absorbers like DampRid in closets, cabinets, and under beds.
- Close blinds and curtains to protect upholstery from UV light.
- Add pest deterrents under the sink and behind appliances. (I like peppermint, but I’ve heard that dryer sheets work too.)
Exterior and Roof Care
You will of course want to take care of the exterior of your RV as well. Unfortunately, I’m not great about this and my RVs have all shown it. In order to avoid a worn-looking rig like mine, be sure to wash and wax the exterior before storing your RV.
You’ll also want to inspect all seals and seams on the roof, windows, and doors for cracks or damage and repair with RV-grade sealant if necessary. This will help ensure no leaks occur while you’re away from the RV, something that could cause significant and costly damage.
Other important tasks include cleaning and lubricating slide-out seals using a silicone-based protectant, cleaning the awning, and lubricating all locks, hinges, and stabilizer jacks.
Tire and Suspension Preparation
It’s a well known fact that RV tires are expensive. For this reason, I recommend you give them the care they deserve before storage. Inflate tires to the manufacturer’s recommended pressure and park on boards or tire pads—not bare ground—to prevent dry rot.
If storing for several months, consider using jack stands to relieve weight from the tires and cover the tires with UV-resistant covers to protect them from sunlight, dirt, and ice.

Engine and Generator Care
When we first switched from a trailer to a motorhome, I had to start thinking about a few extra maintenance tasks. The engine needed attention, obviously, as did the onboard generator. Make sure you don’t forget these things as you go through your RV winterization process.
Engine
- Fill the fuel tank to prevent condensation.
- Add a fuel stabilizer and run the engine for 10–15 minutes to circulate it.
- Change the oil and filters. Old oil can contain acids that corrode components.
- Check coolant levels and ensure it’s rated for your expected lowest winter temperature.
Generator
- Change the oil and filters.
- Add fuel stabilizer to the tank and run the generator for a few minutes.
- Check the air filter and spark plug.
Cover and Secure Your RV
Last but not least, you’ll need to protect your RV from the elements. For starters, you’ll want to use a quality, breathable cover to prevent UV damage, bird droppings, and debris buildup.
Besides that, you’ll want to cover vents and openings with mesh or screens to block rodents and insects, and close propane tank valves and cover all regulators to prevent corrosion. Make sure to lock all doors, compartments, and hatches.
Another Method: Blow Out the Water Lines
If you don’t love the idea of putting antifreeze in your water lines, you could choose to blow the lines out instead. This involves using compressed air to move all residual water from the system. The thing is, you have to make sure every bit of water is removed in order for this to work.
To do this:
- Connect an air compressor to the city water inlet using a blowout plug.
- Set the air pressure to 30–40 PSI (never higher than 50 PSI).
- Open one faucet at a time—starting with the furthest from the inlet—and blow air until only mist comes out.
- Repeat for all faucets, showers, and toilets.
- Don’t forget exterior faucets and any washer/dryer hookups.
Frequently Asked Questions
How do I prevent mold and mildew while my RV is in storage?
Moisture control is key in order to avoid mold and mildew. I always start by thoroughly cleaning and drying the entire interior of the rig. I then use moisture absorbers like DampRid or silica gel in cabinets and closets. It’s also a good idea to keep the refrigerator door propped open, and use weatherproof vent covers so you can leave the roof vents open to allow airflow.
How do I protect my RV battery during winter storage?
Like I said above, batteries don’t love cold weather. To protect your RV battery, remove it and store it in a cool, dry location on a battery tender. It’s a good idea to keep the battery off concrete floors and clean terminals, and to apply a thin coat of grease to prevent corrosion.
When is the best time to start winterizing my RV?
It’s imperative that your RV is totally winterized by the time the temperature drops below freezing for the first time. I like to plan ahead and complete the process in early to mid-fall to avoid rushing when temperatures decide to nosedive suddenly.
Do I need to drain water lines and tanks before winter?
You absolutely do need to drain the entire water system. In fact, this might be the most important aspect of winterizing an RV. This is because even a small amount of leftover water can freeze and crack fittings or pipes.
Can I skip using antifreeze if I blow out the water lines with air?
You definitely can. That said, a combination of both blowing out the lines and antifreeze will ensure your water lines are as safe as possible.
How often should I check on my RV during winter?
I recommend checking on your RV at least every 4–6 weeks. You’ll need to inspect for snow buildup, leaks, and pests, and make sure your cover remains secure.
Can I use regular car antifreeze in my RV?
Absolutely not. Automotive antifreeze is toxic and not safe for potable water systems. Always use RV/marine-grade pink antifreeze made from propylene glycol.
As you can see, there is a lot to do to prepare your rig for the winter season. Fortunately, the winterization process can usually be completed in a single day!

In-Season RV Maintenance Reminder

7 RV Preparation Ideas to Give You A Jump Start
How to Keep Your RV Plumbing System Running Smoothly