
RV Cooking: No-Oven Meals for Hot Summer Days


While the greatest part of being out on the open road is the change of scenery, of course, a close second is a change in the chore of cooking. In the middle of summer, there’s not much worse than heating up the old house oven for some bake time. The same is true while on RV adventures. Avoid heating up the ol’ RV with traditional oven meals. Instead, consider these various RV cooking methods: air fryer, microwave, and campfire.
Meal preferences and meal preparing can vary as much as other lifestyle choices, different strokes for different folks, as the old TV song goes. What might be right for you, might not be right for some. With that mind, this article will provide several samples for a variety of meals, ranging from no cook time to some quality time around the firepit, and everything in between. Keep it healthy while gone from home, or let your diet take a vacation from the norm as well. Choice is up to you, we just serving up a variety of recipes!
Healthy Salads for Hot Summer Days
Bringing along pre-made salads that are cool and refreshing on hot summer days is a great idea for a few reasons. Not only are these salad recipes quick and easy to make before leaving, they are healthy choices for a light lunch or dinner. Toss together with no baking, store in fridge and have a one-bowl dish that needs no prep time. Easy Peasy!
A fruit salad that is sure to be a hit with everyone is the Watermelon Strawberry Salad (B). When making ahead, it’s suggested that you mix the watermelon, strawberries, and cucumbers together in a bowl, but store the dressing, feta cheese and mint leaves in three separate baggies or small containers. By storing the ingredients this way, the accumulated moisture at the bottom of the salad won’t be as heavy. When ready to serve, drizzle the dressing over the fruit, then toss with cheese and mint leaves.
(b) Watermelon Strawberry Salad
www.joyousapron.com/watermelon-strawberry-salad
A refreshing, vibrant fruit salad made with juicy watermelon, sweet strawberries, crisp cucumbers, and tangy feta, tossed in a light honey lime dressing. No cooking needed — just fresh, seasonal ingredients and 15 minutes!
Ingredients
- Watermelon: Cut into bite-sized chunks (in season May–Sept)
- Strawberries: Sliced fresh (in season Apr–Jul)
- Cucumbers: English or Persian preferred, sliced
- Feta cheese: Crumbled
- Mint leaves: Fresh, leaves only
For the Honey Lime Dressing:
- Honey
- Fresh lime juice
- Olive oil
- Pinch of salt
Instructions
- Make the Dressing: In a small bowl, whisk together honey, fresh lime juice, olive oil, and a pinch of salt until well combined.
- Prepare the Salad: Slice watermelon, strawberries, and cucumbers into bite-sized pieces. Add to a large mixing bowl.
- Combine: Add crumbled feta and fresh mint leaves to the bowl. Pour dressing over the top.
- Toss & Serve: Gently toss all ingredients until evenly coated. Serve immediately or chill for a short time before serving.
Play around with the recipe, making it your own, by possible additions/amendments such as basil, goat cheese, tomatoes and cotija cheese.
For something with more pizzazz, consider a 10-minute Mediterranean Chopped Salad (c)
Again, this is one of the meals where the prep work can be done at home and stored in the fridge until mealtime. A no-cook meal is likely the best type there is, especially when the cooking needs to be in a confined area like an RV kitchen. As with the strawberry salad mentioned above, it would be best to keep the dressing separate and add it into the mix at mealtime.
(c) 10-Minute Mediterranean Chopped Salad
www.todayissomeday.net/blog/simple-lazy-rv-meals
A fast, flavorful, no-cook salad that’s perfect for RV living! Packed with Mediterranean favorites like chickpeas, olives, cucumbers, and feta, it’s healthy, filling, and ready in just 10 minutes.
Ingredients
- 1 (15 oz) can chickpeas, drained and rinsed
- 1 medium cucumber, chopped
- ½ cup cherry tomatoes, halved
- 1 red bell pepper, chopped
- 8 tsp kalamata olives, pitted and sliced
- 6 tsp red onion, finely diced
- 6 tsp feta cheese, crumbled
For the Dressing:
- 6 tsp extra virgin olive oil
- 6 tsp red wine vinegar
- 1½ tsp Dijon mustard
- ½ tsp oregano
- ¼ tsp garlic powder
- ⅛ tsp kosher salt
- ⅛ tsp ground black pepper
Instructions
- Chop all vegetables and combine with chickpeas and feta in a large bowl.
- In a small bowl, whisk together all dressing ingredients until well emulsified.
- Pour dressing over salad and toss to coat evenly. Use just enough dressing to lightly coat ingredients.
- Refrigerate for a few hours or overnight for best flavor. Serve chilled.
Quick and Easy RV Cooking
While this next meal is more of a nod to the old cowboy lifestyle, it is so quick and easy that it had to be included. This no-cook recipe can be altered a bit, for instance, roast the hot dogs over the open flame of a campfire. Not only will this still resemble an Old West-style meal, but it can also let the kids join in the fun. But this recipe calls for cold hot dogs and canned, 3-bean salad. Fancy, it is not. But, if cool-temperature foods coupled with no culinary work required, this back-to-the-basics meal just might be perfect for your next road trip.
Another no-mess meal mashup is rotisserie chicken and….anything! Truly a one-size-fits-all kitchen staple, the rotisserie chicken is versatile enough to be paired with an unlimited number of options.
Campfire Favorites
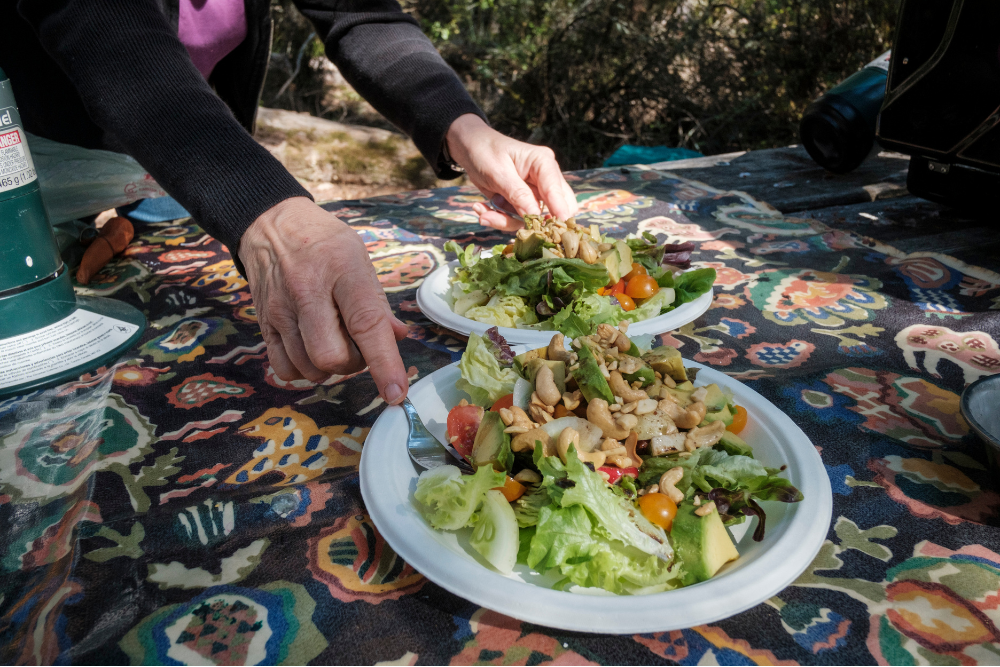
For these campfire recipes, one staple is almost always required; aluminum foil, don’t leave home without it! Of course, if you travel with a cast iron skillet, that is also an optimum piece of equipment for open flame cooking.
Loaded campfire nachos (g) are sure to be a great hit for any crowd. It can also be a bit of a hit to a grocery budget, as it calls for a good amount of items. But, if chips smothered in Mexican-style cheese, queso fresco, diced green chiles and more vegetables, than be sure to add this recipe’s ingredients to your shopping list before hitting the open road.
What would a campfire cookout be with the cowboy’s favorite meal? Serve up grilled steak and skillet potatoes (h) for a blast from the (old west) past. This is where the cast iron skillet can be awfully handy to have. Bring it into the cook game and rustle up some grub just like they did it generations ago.
(h) Grilled Steak and Skillet Potatoes
This hearty campfire dinner pairs juicy grilled ribeye steaks with golden, crispy cast iron skillet potatoes. Packed with rustic flavor and made entirely over the fire!
Steak Ingredients
- Ribeye steaks
- Salt
- Black pepper
- Garlic powder
Skillet Potatoes Ingredients
- 2–3 medium potatoes, quartered
- 4 cups water
- 1 tbsp baking soda
- 2–3 tbsp canola oil
- ½ small onion, diced
- 2–3 cloves garlic, minced
- 1 tbsp butter
- 1 tsp rosemary
- Salt, pepper, garlic powder to taste
Instructions
- Prepare the Fire: Preheat a campfire or grill to high heat (~400°F) for direct cooking.
- Parboil the Potatoes: In a ceramic Dutch oven over the fire, bring 4 cups of water to a boil. Stir in baking soda, then add potatoes. Boil for 10–15 minutes, until fork-tender but still slightly firm. Drain and cool for 5 minutes.
- Crisp the Potatoes: Add canola oil to a cast iron skillet over the fire. Spread potatoes in a single layer and cook until crispy (8–10 minutes).
- Add Flavor: Stir in diced onions and garlic. Cook until fragrant and browned (3–4 minutes). Add butter, rosemary, and seasoning. Stir for 2 more minutes, then remove from heat and keep warm.
- Grill the Steaks: Season steaks with salt, pepper, and garlic powder. Grill over direct heat, flipping once, until desired doneness is reached. Rest before slicing.
- Serve: Plate the steak with a generous scoop of skillet potatoes. Enjoy hot by the fire!
Of course, s’mores (i) will always go hand-in-hand with an open camp fire. Bring along some graham crackers, marshmallows, Hershey’s chocolate bars and some skewer sticks and make some traditional campfire s’mores. Fancy it up a bit, if you would like, by adding sliced bananas, swapping the chocolate bar for a Snickers or Reese’s peanut butter cup, or adding some Nutella on the bottom graham cracker.
Air Fryer
Whether for breakfast, lunch, or dinner, an easy meal awaits with just a loaded basket in the air fryer. Depending on how many groceries you bring along, air fryer meals in the RV can be as low-key or detailed as you would prefer. And, be sure to bring along the air fryer basket liners to make cleanup a breeze, especially when choosing the bacon and eggs recipe.
(d) Bacon and Eggs (Air Fryer Style)
Classic bacon and eggs—made easier than ever with an air fryer! A simple, hearty breakfast that’s ready in under 15 minutes with minimal cleanup.
Ingredients
- Bacon strips
- Eggs
Instructions
- Preheat air fryer to 350°F (180°C).
- Place bacon strips in the air fryer basket in a single layer.
- Air fry for 6–8 minutes, or until crispy to your liking. Remove and set aside.
- Crack eggs directly into the air fryer basket (or into silicone molds for neater shape).
- Air fry eggs for 3–4 minutes, or until cooked to desired doneness.
- Serve eggs alongside crispy bacon. Enjoy immediately!
To experience air fried bacon and eggs (d), plan on about six to eight minutes for the bacon, and another three to four minutes for the cracked eggs. Preheat the air fryer to 350 degrees and let it work its magic! Add a side of hash browns (e) by cranking up the heat to 375 and letting the seasoned and grated potatoes become a crisp-brown in about ten to fifteen minutes. Don’t forget to flip them halfway through the cook time for even levels of crispiness.
Perfect for lunch, dinner or even a healthy snack, the veggie medley (f) is a great option for those not having a lot of storage room inside the fridge. All ingredients can be stored on the counter or in a cabinet, with the exception of the grated cheese, but it is optional.
The most amount of work for this recipe is the chopping of the vegetables, and that won’t cause you to break a sweat at all. In a preheated air fryer, add the seasoned vegetables in a single layer and cook them for about ten to fifteen minutes, pulling them when the veggies are soft yet with slight crisp. If there is parmesan cheese in your RV’s fridge, sprinkle the perfect amount over the vegetables and be all set.
(e) Hash Browns (Air Fryer)
Crispy, golden air fryer hash browns made from scratch with simple ingredients. A perfect camp-friendly side dish that’s ready in just 15 minutes!
Ingredients
- Potatoes
- Olive oil
- Salt
- Black pepper
- Paprika (optional)
Instructions
- Wash and peel the potatoes (if desired), then grate them using a coarse grater.
- In a bowl, toss the grated potatoes with olive oil, salt, pepper, and paprika (if using).
- Preheat air fryer to 375°F (190°C).
- Spread the seasoned potatoes in the air fryer basket in a thin, even layer.
- Air fry for 10–15 minutes, flipping halfway through, until golden and crispy.
- Serve hot as a side dish for breakfast or brunch.
Microwave
Of course, just as easy is the ‘cook before you leave and let the microwave do the work’ method of food prep. Put that RV fridge to use and reheat those homemade meals with love.
(f) Air-Fried Veggie Medley
A quick and colorful air-fried vegetable side dish that’s packed with flavor. Perfect for camping meals or easy weeknight dinners!
Ingredients
- Assorted vegetables (e.g., bell peppers, zucchini, carrots, broccoli)
- Olive oil
- Garlic powder
- Italian seasoning
- Salt
- Black pepper
- Grated Parmesan cheese (optional)
Instructions
- Cut the vegetables into bite-sized pieces.
- In a bowl, toss vegetables with olive oil, garlic powder, Italian seasoning, salt, and pepper.
- Preheat air fryer to 375°F (190°C).
- Place vegetables in the air fryer basket in a single, even layer.
- Air fry for 10–15 minutes, shaking or flipping halfway through, until tender and slightly crispy.
- Sprinkle with grated Parmesan if desired. Serve warm as a flavorful side dish.
A quick and easy microwave oven recipe (a) is one that the whole family will love, and the best part is there won’t be any large pans to wash afterward. While not traditional, a recipe does outline how to make a grilled cheese sandwich in the microwave. Gather your favorite bread, choice of cheese, butter and some paper towels and have an ooey, gooey cheese sandwich ready in less than a minute. Make it a fancy version by adding bacon, tomato slices or sandwich deli meat. Just be sure to add the extras after the cheese melts in the microwave.
Bringing along pre-made casseroles, pasta dishes, or cooked meat could also be some options for the microwave. To skip out on any cooking at all, this is a great option. Plus, leftovers such as spaghetti, depending on the preference, wouldn’t necessarily even have to be reheated, as it, like revenge, could be thought of as a dish best served cold.
(a) Toasted Grilled Cheese (No Stove Needed)
www.easyhealthyrecipes.com/toasted-grilled-cheese
Soft bread, melty cheese, a toaster, and a microwave create the crispiest, ooey-gooeyest grilled cheese ever – and in no time at all!
Equipment Needed
- Toaster
- Microwave-safe plate
- Paper towels
- Water
- Microwave
Ingredients
- 2 slices bread of choice (potato, buttermilk, whole wheat, etc.)
- ½ tablespoon salted butter (softened)
- 3 slices cheese of choice (Swiss, cheddar, muenster, havarti, etc.)
- 1 pinch garlic powder (optional)
Instructions
- Insert 2 slices of bread into toaster. Toast bread to desired doneness, then carefully transfer toast to microwave-safe plate.
- Lightly butter one side of each piece of toast. Sprinkle garlic powder over butter if desired.
- Place slices of cheese on top of butter on one piece of toast. Cover cheese with remaining piece of toast, buttered side facing cheese. Set aside.
- Wet 1-2 paper towels and gently wring out excess water. Wrap sandwich in damp paper towels.
- Return sandwich to plate, placing sandwich on seam of paper towels to keep it wrapped. Microwave at full power for 30 seconds.
- Check if cheese is melted. If not, continue microwaving in 10-second intervals until done.
- Carefully remove from microwave and serve immediately. Sandwich will be hot!
While serving up meals for yourself and your travel companions is a must, these recipes will allow the oven to be avoided like the plague. Spend more time chilling, and less time heating up the RV with these simple alternatives.
Campfire Nachos (g)
Variety of S’mores (i):

Creative RV Storage Solutions for Small Spaces

Comfort Food and RV Cooking: 3 Fall Meal Tips To Warm You Up
8 Tips For RV Snowbirds Before Traveling South For Winter